Tuesday, May 28, 2013

How to Grow A Vegtable Garden In Your Backyard

We love produce around here, and as a juicer, I go through a TON of fruits and vegetables.  Growing veggies in a small place is surprisingly simple.  You only need a very basic knowledge and sunshine.  It's so easy, and I'll give you an basic tutorial that will hopefully inspire some one out there to give it a try.

So here she is, our little backyard garden, starts laid out and ready to be planted:


This little piece of tilled land can put out a lot of produce; you'd be surprised how much.  Did you know a cherry tomato can literally give you over a 100+ cherry tomatoes (that's why some are called "sweet 100s").  It's dinner time, and you want some tomatoes for the tacos, just walk into the backyard.  Have I convinced you to try this??????  Here is a basic outline.

1. Land
You need a small plot of land.  You have a few options.  Option 1: you can do a raised bed garden, using cedar boards or, in my case, cement garden wall pavers.  This option is fairly simple.  You pick a spot, build (or buy) the sides of a box and fill it with dirt.  I would recommend putting down some weed/grass barrier if you are setting the box on grass because you'd be surprised what might find its way up through the dirt.  You do not want pressure treated lumber because it can leech chemicals into the soil.  Here's a picture of our sandbox, its the same exact concept (you can see the actual garden in the corner).


Option 2: plant directly in the ground.  You will need to prep the ground and there are different ways of doing this, but I prefer the good old fashioned method of tilling the land with a rototiller.  You probably don't own one of these, but you can borrow from someone, or I imagine they rent these things out.  First, mark the area with string and tent spikes, cut the sod (if there is grass) and till the land with the rototiller.  Depending on your ground, you may have some rock picking to do.  I survived this as a child, and you will too :). You can turn the land by hand, but its a LOT of work.

Make sure that where ever you place your garden, it is the sun most of the day.  

2. Enrich your soil
There are also many ways of doing this.  You can buy a bag of steer manure at Fred Meyers (I know it sounds gross, but this is probably the most simple method), you can use your garden area as a compost pile, throwing in veggie and  fruit scraps during the year, prior to plantings; you can get compost from anyone who has horses and cleans stalls (just be sure its "cooked" for a while or you will have a lot of weeds), I've even asked our local Starbucks to give me their used coffee grounds and they did.  There's over 100 pounds of Starbucks coffee in my garden (I joke that its my international garden because there are coffee beans from other continents in my backyard).  If you are buying soil form a garden center, it may already be enriched (talk to the garden center).  Even if you did nothing to the dirt, veggies would still probably grow.  Like I said, this is simple.

3. Select plants
You can grow from starts or seeds.  I like to do green beans from seed, and if I had space, I would grow corn from seed too.  The rest of my plants, I grow from little starts.  It's just easier for me, and because I'm not an expert, I generally don't fail with a start.  The little tag in the start will tell you how to space the plants in the ground, when to plant, and how long they take to mature; and pay attention!  Yes, one zucchini plant gets really big and will feed an army.  Unless you are juicing, you only need one.  Other plants like pumpkins and squash take up a lot of space and so they don't work well in a small garden.  I like to lay out my plants, prior to planting.  You can see that in this picture:


Here is what I have in my little garden: zucchini, green beans, yellow and purple potatoes, tomatoes, red bell peppers, yellow squash, mint, romaine lettuce, kale, butter lettuce, cucumbers, cauliflower, and nasturtium flowers (edible).  I plant the flowers around the edge of the garden for beauty.

4. Plant and Water
Here's the fun part.  Put these treasures in the ground.  With a start, its simple; just plant it in the ground.  With seeds, here's how my Momma taught me:

Lay out string that is attached to a stick, or tent spikes.  I used cooking skewers.

Next pay attention to the back of the package of seeds.  It will tell you how deep to plants them (which is generally VERY shallow).

Next, make a furrow with your finger, following the string so that your line is strait.

Next, drop the seeds into the ground (the seed packet will tell you how far to space them).  See the little white seeds?

Cover with dirt and water.

It may sound complicated, but after you do it once, it's pretty simple.  As you can see, the garden looks very sparse right now, but once all the plants mature, it will be full, with barely enough room to walk between the plants.

I hope your try it!

Please feel free to ask any questions.

Many blessings to you! - Home Centered Girl

Monday, May 13, 2013

Beautiful Color For The Porch, Planting Basics

Hi Readers!  Do you love to grow things?  I do!  I'm a nurturer at heart and love to nurture plants through out the summer.  Do you have hanging baskets at your place?  Have you ever wondered how to keep plants beautiful through out the growing season?  If you're a Gardner than you are going to know most, if not all of these tips and tricks.  If you've never tried it, but would love some color on your front porch, you may be surprised at how simple this really is.  I'll show you how to put together a basic annual flower pot for the porch.


Step 1.
Select your plants.  If you have mostly shade, then you need shade plants, if you have mostly sun, then you need sun plants.  At the nursery, just check the tag inside the pot and it will tell you what kind of sun it will tolerate.  You can plant a sun plant in the shade, but it won't grow very much.  If you plant a shade plant in the sun, it will wither and die.

Select your pot.  Almost anything will do as long as it has holes in the bottom for drainage.  If it doesn't have holes, then drill some in.  The pot I'm demonstrating for you was actually a big tin drink bucket from Target and my husband drilled some wholes in the bottom for me.  You can also plant directly in the ground, and many plants really like being in the ground.  (just ignore all the potting soil and garden tools on the ground in the picture :)

Now your on to soil.  Any old potting soil from a garden center will do.

Here's a tip on saving potting soil.  If you have a large pot and want to conserve some potting soil, put plastic containers in the pot prior to filling with dirt, like this:


Next, I arrange the plants on the porch and then use the same design in the pot.  Remember!  It's the beginning of the growing season.  These plants are going to grow.  Mine usually double to quadruple in size by the end of summer, so its okay to leave some space.


Add dirt, place your plants, and pack the potting soil around them.


Last step, water the "girls".  Always water after you plant.

You will need plant food.  You will need to feed these plants.  Ideally, you would do this once a week.  The potting soil you purchased likely has fertilizer in it, but you will need to start feeding soon after potting.  The most well known fertilizer is Miracle Grow.  You mix this "blue powder stuff" (getting technical) with water in a jug and dump it (more technical terms) on the pot.  It's good to give it enough liquid until it comes out the drainage holes in the bottom of the pot.  You can also purchase potting soil that has slow release fertilizer in it.  (I would still fertilize my plants regularly).

That's it.   

Now, one of the best parts of growing your own flowers, is that you get to cut bouquets for the house.  Did you know that women will release oxytocin when cutting flowers from the yard and arranging them in a vase for the house.  Cool huh?!?  Here is my first cut flower arrangements of the season. 
Thank you so much for reading!!  Many blessings to you - Home Centered Girl

Thursday, May 2, 2013

Craft Storage Box Turned Battery/Charging Storage

Hello Friends!  No I haven't abandoned my blog!  I've just been busy (like all of you).  Since I'm a new blogger, I'm going to have to figure out my time management sacrifice sleep in this area.  I really enjoy writing this blog and hope you enjoy reading it.

On to the project.  This one is for you OCD organizers.  I know, organizing batteries and chargers, it may seem a little over board, but it was a very simple project and got all the random batteries out of the junk drawer.

Here is what you need:


I found this at Ross for $6.99.  Ross is actually a great place to find organizing products.  They have a small selection, but some wonderful products at a much lower price.

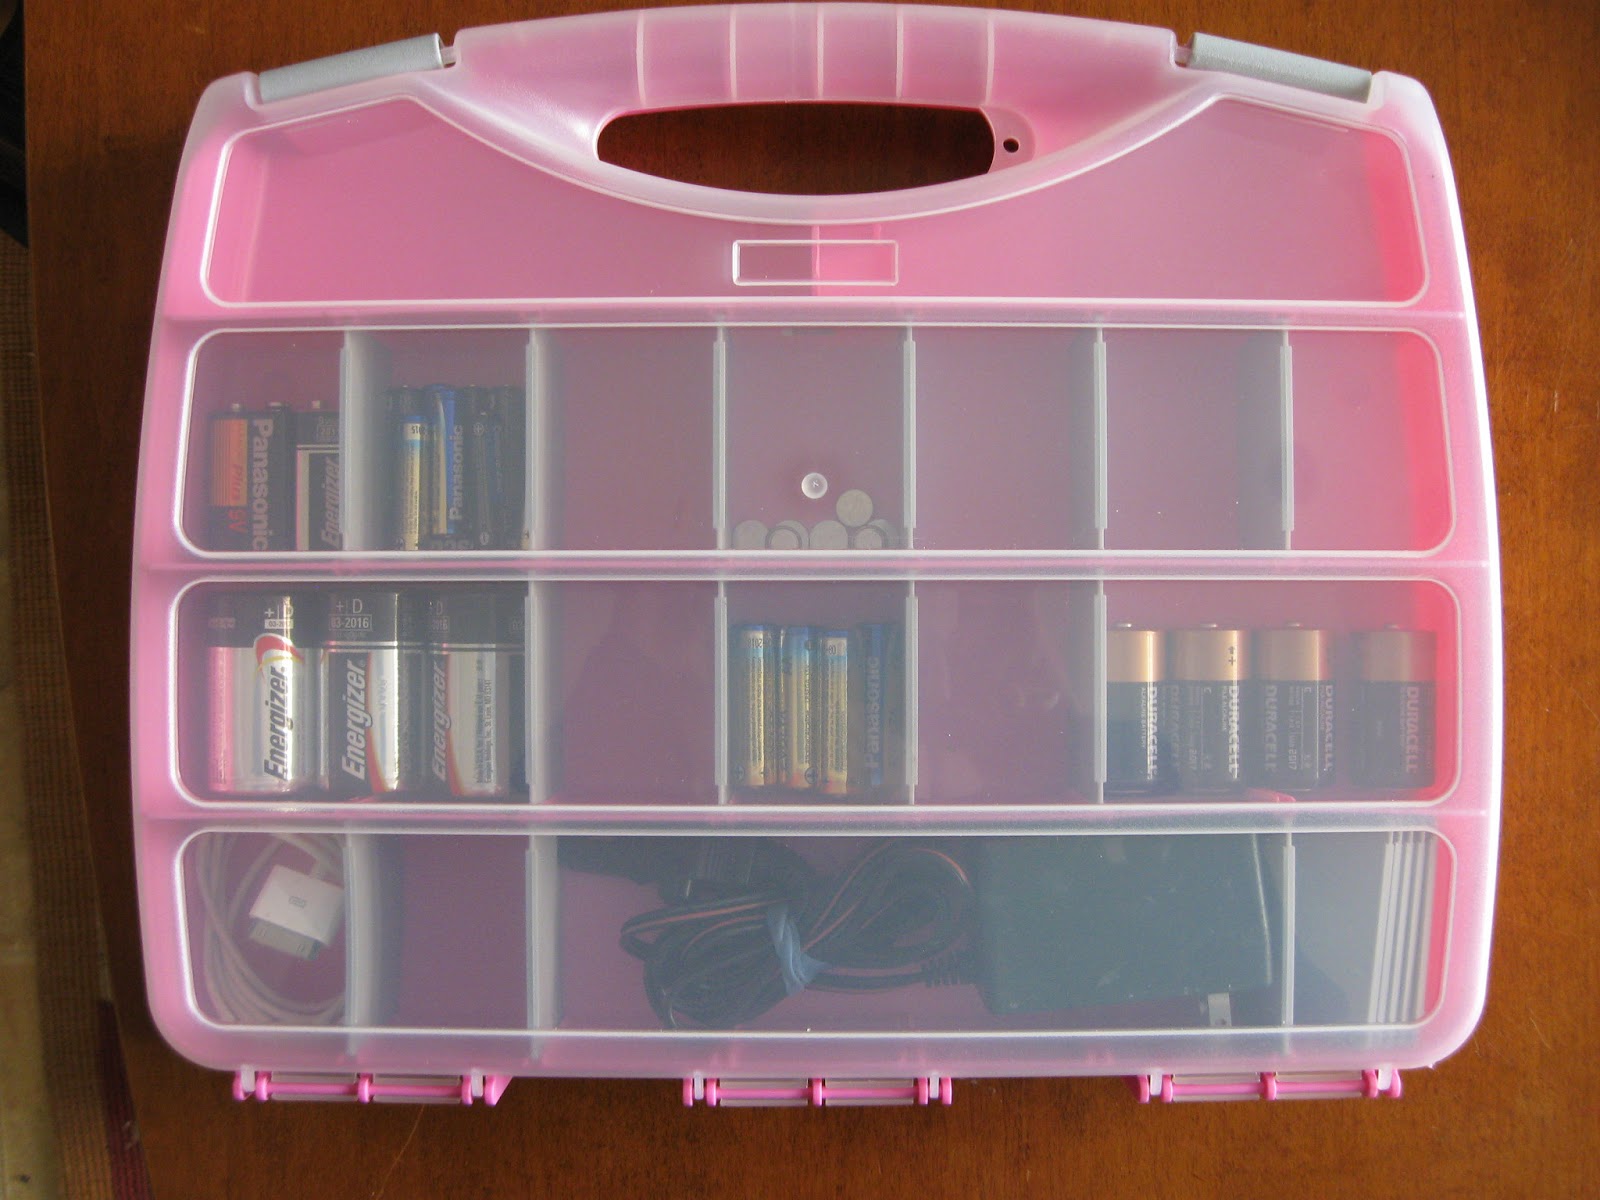
This caddy works great because of the clear plastic (I can see what I need to stock up on), and removable dividers, so you can enlarge the storage space.  It also seals all the individual sections when you close the lid, so the batteries and chargers stay in place.

Here is what it looks like:


Here's the OCD part.  Yes, I used my label maker to categorize everything.  I know, I can't help myself.

What's inside:
-batteries
-extra IPod charger
-accessory charger for outside gear

There's room for more chargers, and all the batteries I need to stock up on in the future.

This was a quick, simple project.  When I showed one of my besties this project, she thought it would be great for Lego Math (a homeschool method for teaching math).  I'm sure you could think of many other uses for this bin.  Here's another picture (non-labeled for the less OCD readers); I hope you enjoyed this post!

Thanks for reading, I truly appreciate it! Many blessings to you - Home Centered Girl